Processing Primer
An OLA-sponsored article about what goes into making eyewear in a lab
by Alex Yoho, ABOM
One of the most frustrating dispensing moments can be explaining the cost of today's eyewear. In this OLA-sponsored article, we will examine the multi-step series of processes involved in making eyewear.
The purpose? Building your confidence in charging a fair price and helping you educate patients.
Traditionally, lenses have been supplied to labs as semi-finished blanks. The front side of the lens has the base curve that a small range of prescriptions requires. Since there are myriad prescriptions, there must be multiple base curves—usually six—for each series of lenses developed.
With multifocals, there are 14 standard adds in each lens series. So, for each type—for example, a flattop 28—the lab will have to stock 84 pairs (add powers multiplied by six base curves). Of course, the more common the add power, the deeper the stock.

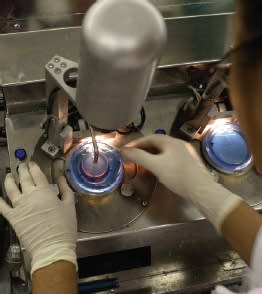
Eyewear requires a multi-step series of processes. Images by Essilor International
LENS INVENTORY
Now consider lens materials. Here are 12 popular ones: glass in standard index, 1.60, 1.70, and 1.80; and in plastics, CR39, 1.54, 1.56, 1.60, 1.67, 1.74, polycarbonate, and Trivex. That's just a dozen of the possibilities (and there are more), times 84 in each type of multifocal. That's 1,008 pairs of just flattop 28s just to be one pair deep in stock.
Then, consider that glass and plastic lenses are available in several colors, not to mention factoryapplied AR, photochromics, and polarized options.
Bottom line? Stocking a minimum of the most popular lenses requires a massive inventory for a lab.

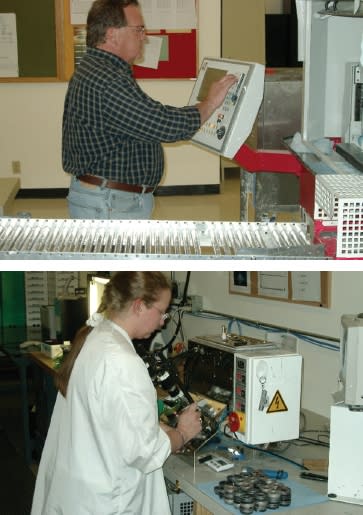
Despite the increasing automation of labs, trained technicians are still needed at each step of the way. Images courtesy of Seiko Eyewear.
LAB PROCESS
Next, consider the basic lab processes. When your order is placed, an amazingly complex series of processes is begun.
■ EDITING STATION. The editing station is the first stop. Here a skilled technician analyzes and brings attention to parts of the order that will require special handling or finds information that may be lacking and would send the job to customer service for a phone call requesting the information.
■ FRAME DATA. If all is in order, the job is sent to the next station, where the frame information must be gathered. The frame, or a lens, is placed in a tracer that digitizes the lens shape and size. This will be used by the computer to calculate lens thickness, multifocal position, and size of the blank needed to complete the job.
■ DATA ENTRY. Onto data entry to input all of the particulars into the computer. A slip can result in costly redos. The worksheet will contain all of the information needed to complete the eyewear—from reordering stock used to each machine's settings.
■ STOCK. As the lens blanks and frame are pulled from stock, bar codes on the worksheet are scanned to initiate automatic ordering.
■ SURFACING. Then the job heads for the surface room. The blocker is the first station. The blank is now "blocked" using a metal disc that has special alignment holes for the various machines. Information from the computer will ensure that the axis, bifocals, and optical centers will be precisely positioned on the blank. These blocks are precisionmachined to fit the grinding and polishing machines.
■ GENERATING. The first grinding process is generating, where either a diamond-rimmed cup tool or single-point diamond cutter (similar to a lathe tool) removes all but 2/10mm of stock and puts the rough curves required on the lens. The generator is one of the most expensive pieces of equipment in the lab. Though the cut is rough, it is precise. With digital wavefront calculations being added to lenses, accuracies of 1/100mm are now possible from the generator with finishes ready to polish.
■ FINING. Next, a lap—a slab of metal or composite plastic with the exact curve required to grind the lens—is selected. Usually, an interface pad is placed on the tool, which is a precise grit and pad thickness of wet/dry sandpaper.
After placement on the finer, a rapid orbital motion is used as water sprays, grinding the lens to its proper thickness and curve, but leaving a fine frosty finish.
■ POLISHING. A new pad, which has a soft, velveteen finish, is applied to the lap for polishing. The lap and lens are then placed in the polishing machine, which is identical to the finer except polish is sprayed on the lens and lap instead of water.
■ COATING. Next, the lens is de-blocked, inspected, and then sent to the coating room. Scratch-resistant coatings are applied by two different methods.
DIP COATING: The lenses are dipped into lacquer, then slowly removed and placed in a thermal curing oven to harden the lacquer.
SPIN-COATING: The lenses are spun as a stream of lacquer is applied and then quick-cured in an ultra-violet oven. Any anti-reflective, color, or mirror coatings would also be applied at this point.

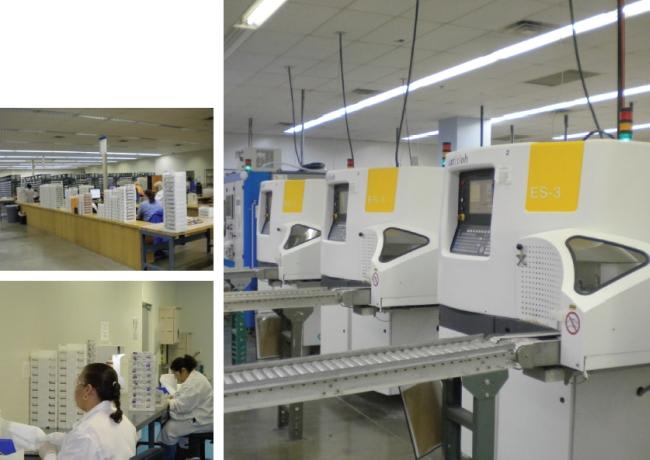
Every step, from inventory to inspection, factors into the price of eyewear. Images courtesy of Hoya Vision Care North America.
FINISHING PROCESS
After coating, the finishing process begins by checking the lens power, axis, and prism, and then dotting the lens for finish blocking. For the edging process, the lens is put on a much smaller block. This blocker receives information from the computer that allows the optical center and any near segment to be precisely positioned with reference to the geometric center of the lens shape and the horizontal axis.
■ EDGING. The lens is now placed in the edger, which receives the shape and size information from the computer, and is ground against diamond grinding wheels or router-like cutting blades that remove unwanted material and place the appropriate edge needed for mounting.
■ BEVELING. The edged lens is "pin beveled" to remove sharp edges. It may then be rolled and polished or faceted on the edge. Rimless lenses are grooved, drilled, or notched. Plastic lenses may need to be tinted or have UV inhibitors applied.
■ MOUNTING. The lenses are now ready to be mounted or "glazed" into the frame. Required hand techniques include: removing a screw; inserting the lens; then replacing the screw, or, heating a plastic frame to allow the lens to be inserted; and then quickly aligning and cooling. The frames are then "bench aligned" and sent to final inspection.
■ FINAL INSPECTION. This consists of checking the lens power, PD, bifocal height, and any other ordered optical parameters. The frame is adjusted to a universal alignment, and the eyewear is inspected for a jewelry-like appearance.
The job is now ready for shipping. And, as the work tray passes the bar code reader, the job is automatically billed and shipped to the appropriate account.
It's important to note that each operation requires at least one operator. Though labs are becoming more automated, a knowledgeable technician is required for each step. So, the next time your patient balks at the price of their eyewear, just remember what it took to produce it.
If you would like to learn more about how eyewear is made, contact your OLA lab or go to www.olalabs.org. EB
Frame Design CostsA frame that goes beyond the run of the mill—whether in function or appearance—must first pass through a conceptual design phase that addresses exactly what it will take to build a functional and fashionable frame. The next step is to commission a batch of prototypes to test the design. You may have imagined a machine that opens and closes a new temple hinge to see if the new design will take the punishment of day-to-day wear. These machines are not imaginary. They are one-of-a-kind and have to perform millions of operations to test a frame. If there are failures, it's back to the drawing board to determine why; and it starts all over. Some of the more interesting designs take years before they are brought to market and the cost of these steps must be factored into the price. |


